
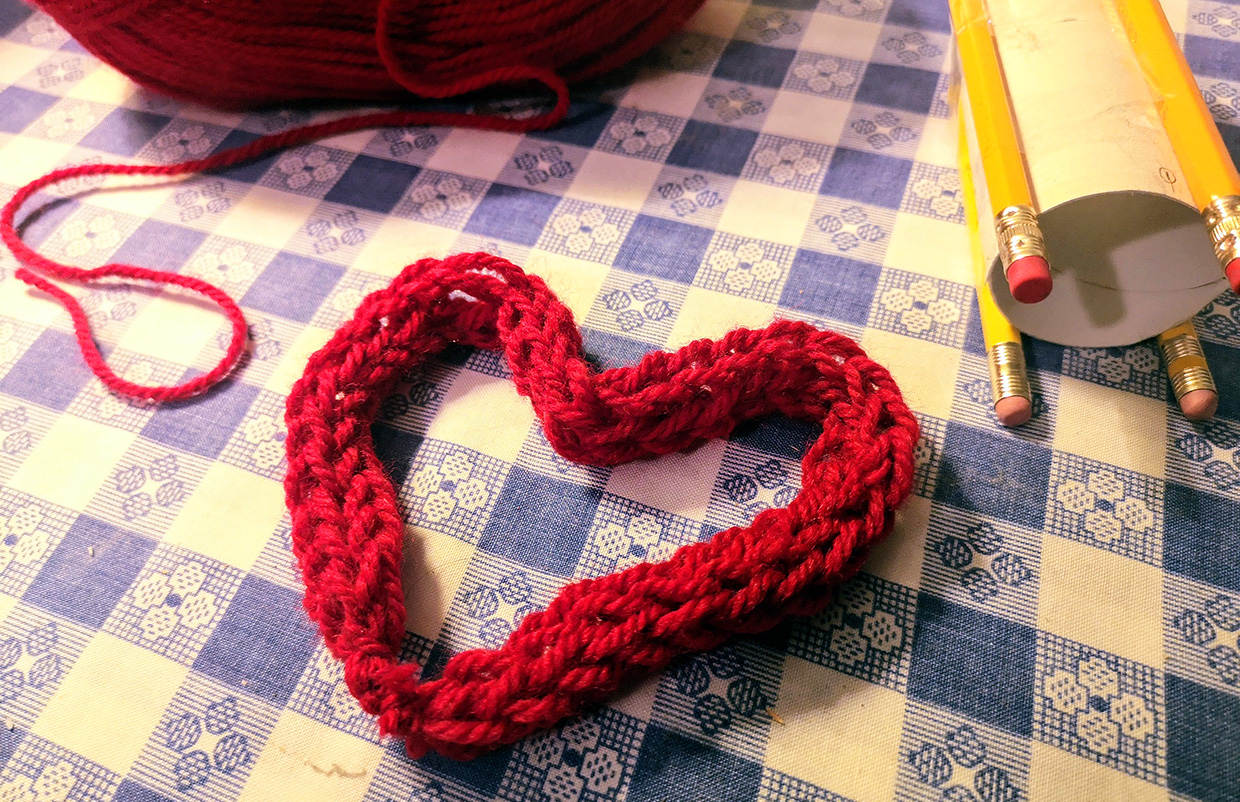
Corking, also called “French knitting” or “spool knitting”, is an easy craft that can keep idle hands busy for hours!
This style of knitting makes a knitted rope or cord that can be used for many different crafts or decorations. A quick online search for corking crafts will show you hundreds of different uses!
Corking is not done with knitting needles, but on a simple knitting loom. In the 19th century, textile factories began using large automatic knitting looms to create fabrics faster and with finer threads.
By 1867, most textiles were produced in factories. Corking, however, remained a fun pastime that introduced boys and girls to the useful skill of knitting.
Toilet Paper Roll Corking Tutorial
Our knitting loom in this tutorial is made with items you can find around your home. Let’s get corking!
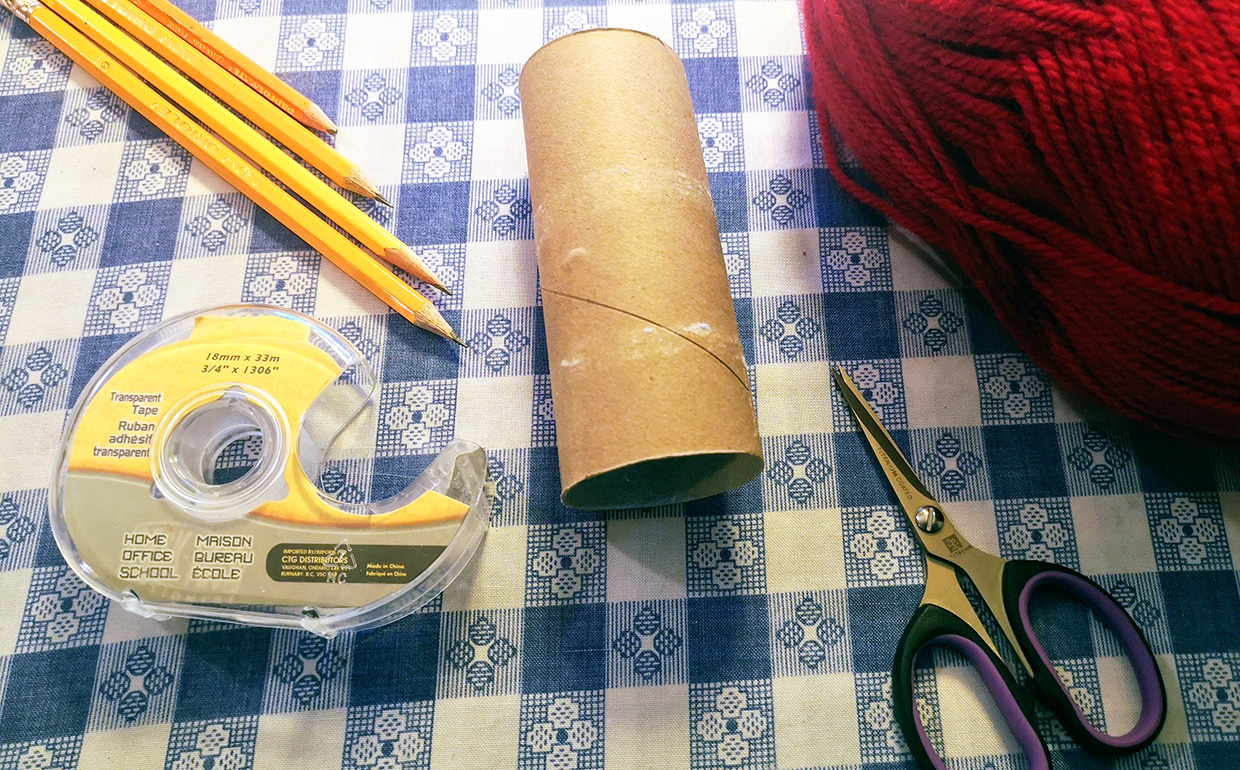
Step 1: Gather your supplies
You will need:
- Yarn
- An empty toilet paper roll
- Four pencils (You can also use chopsticks, popsicle sticks, or straws! They should be about 2 cm longer than the toilet paper roll.)
- Tape
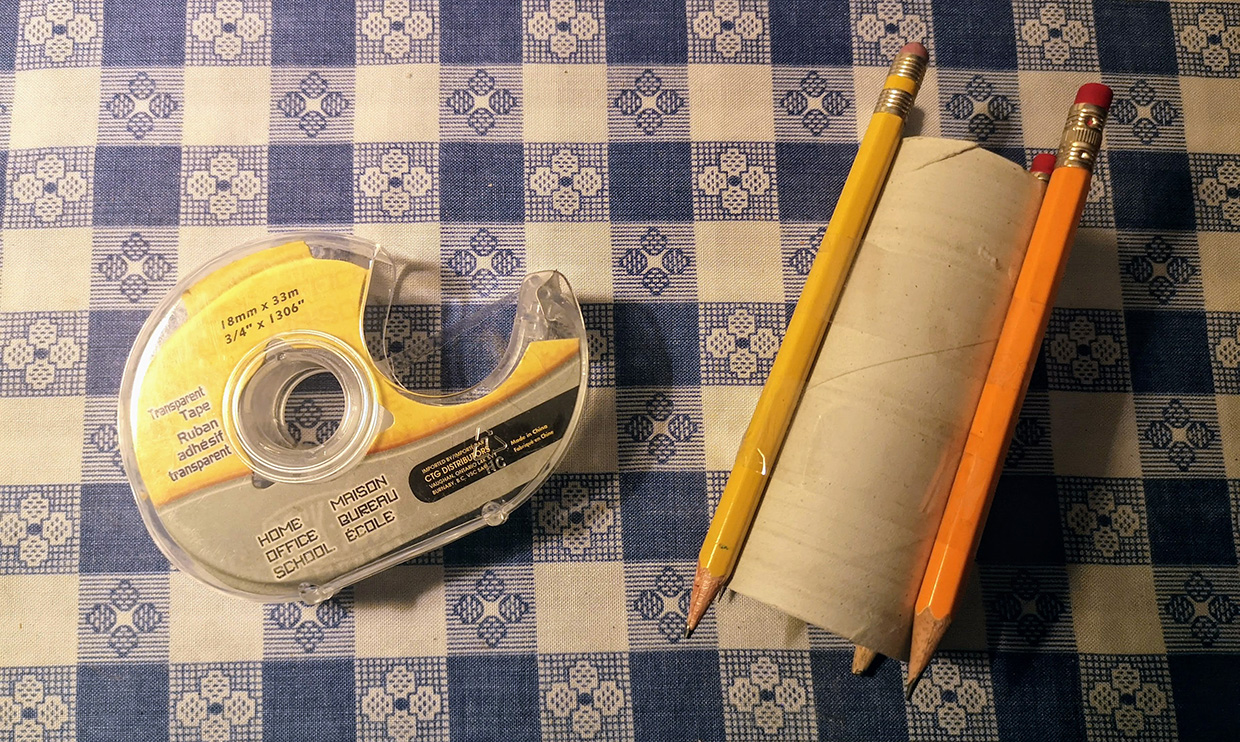
Step 2: Make your knitting loom
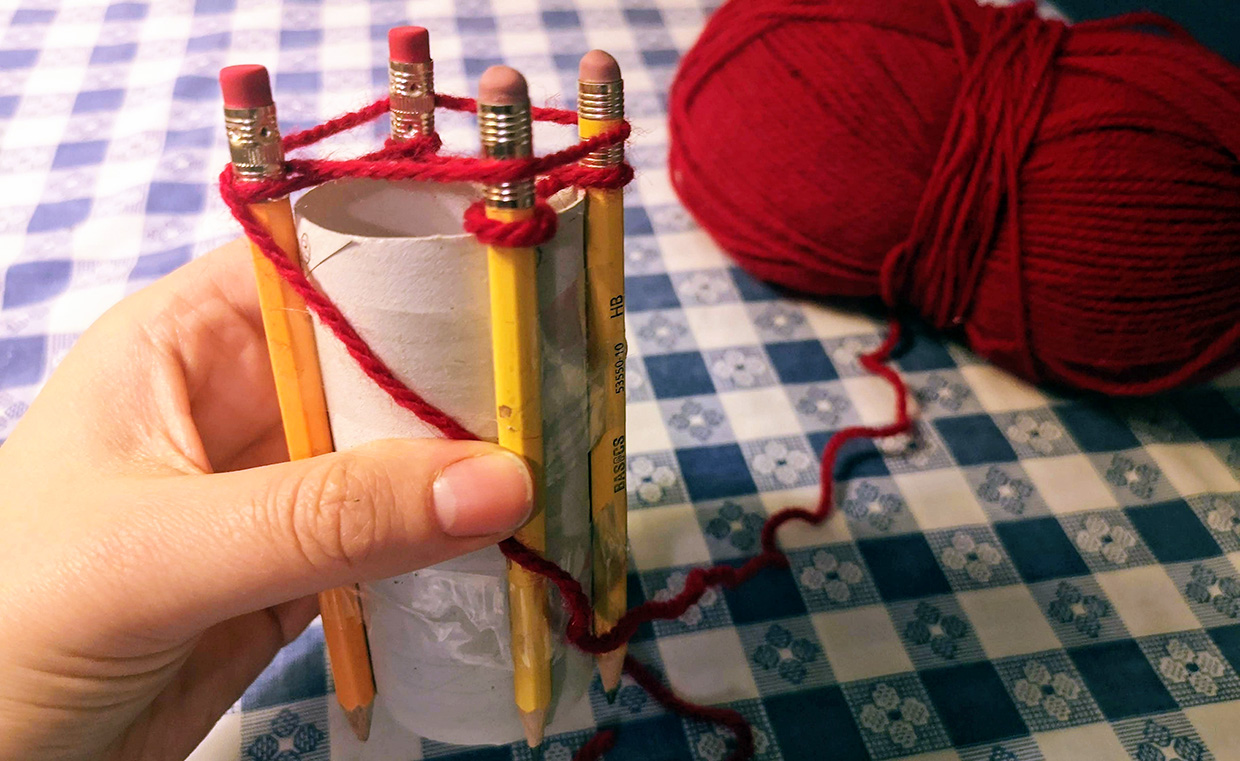
Tape the four pencils (or other sticks) to the toilet paper roll, spacing them out evenly. The pencils form the pegs of the knitting loom.
Step 3: Foundation stitches
Pull the yarn through the toilet paper roll, leaving a bit of a tail.
Holding the yarn in place with your left hand, use your right hand to wrap the yarn clockwise around the first peg. Wrap each peg, moving clockwise around the loom.
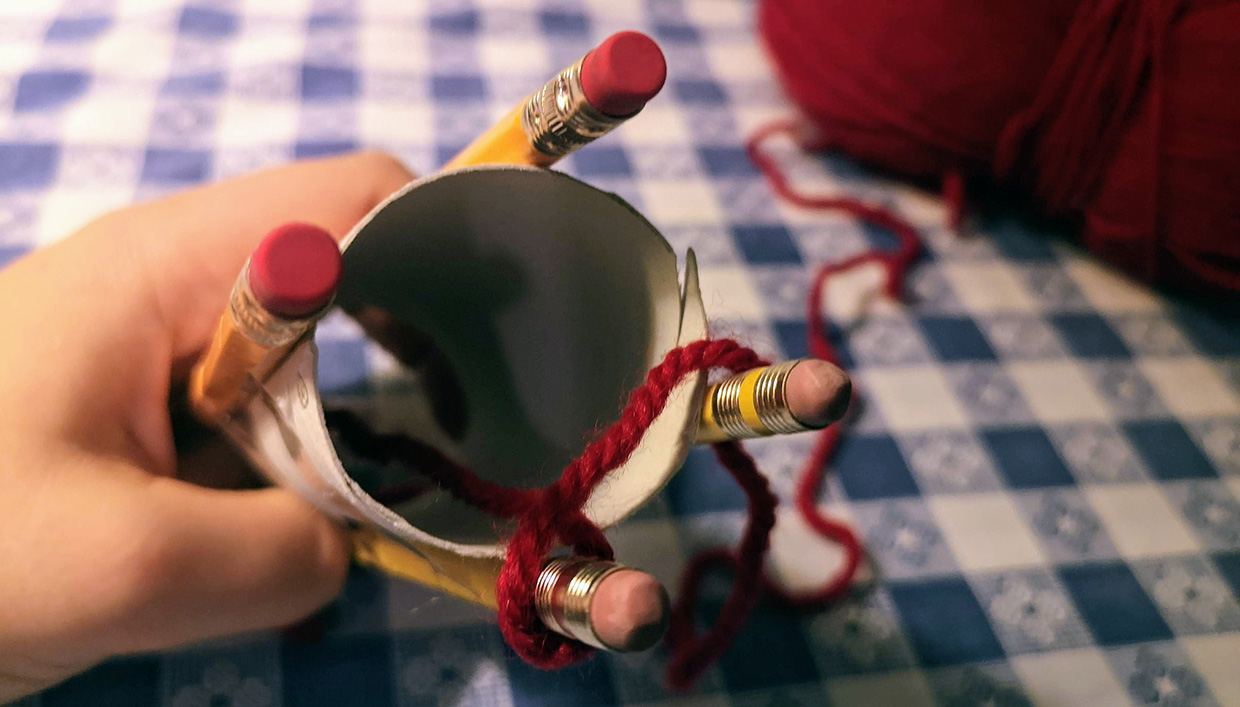
When all pegs have been wrapped with one loop of yarn, wind the yarn around the outside of all four pegs.
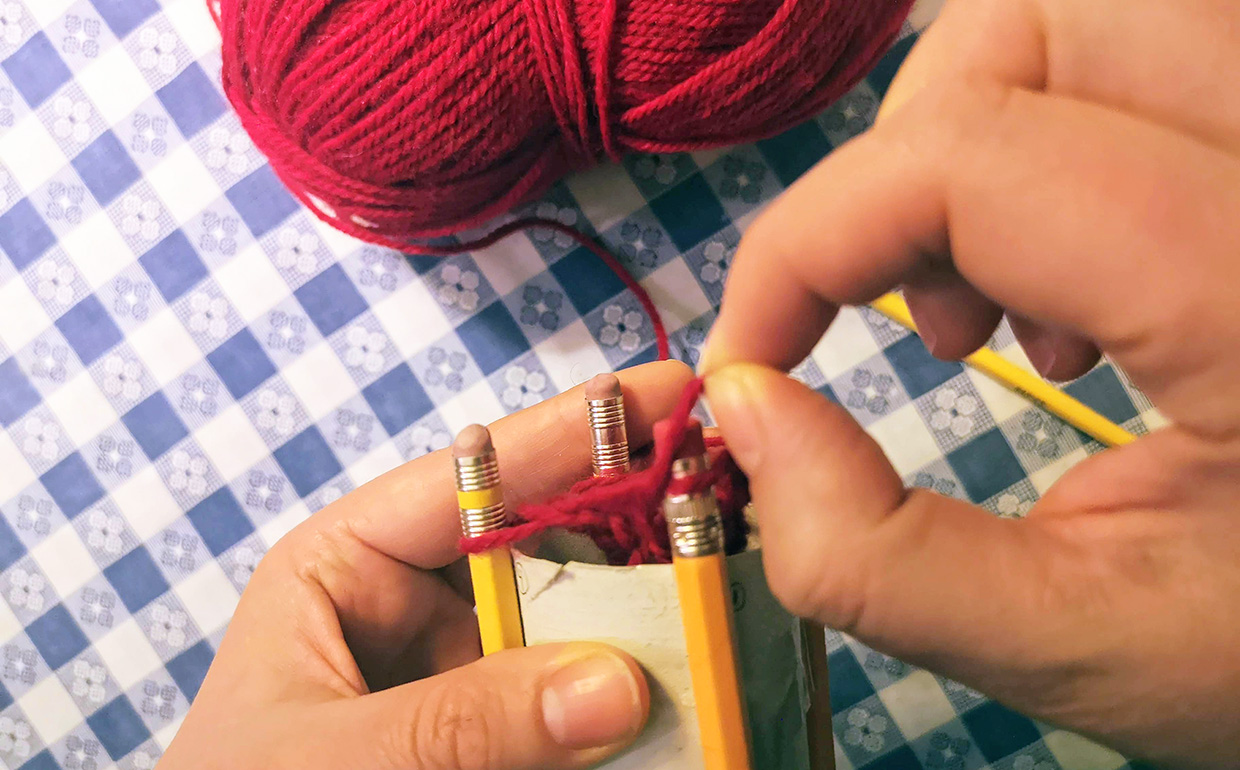
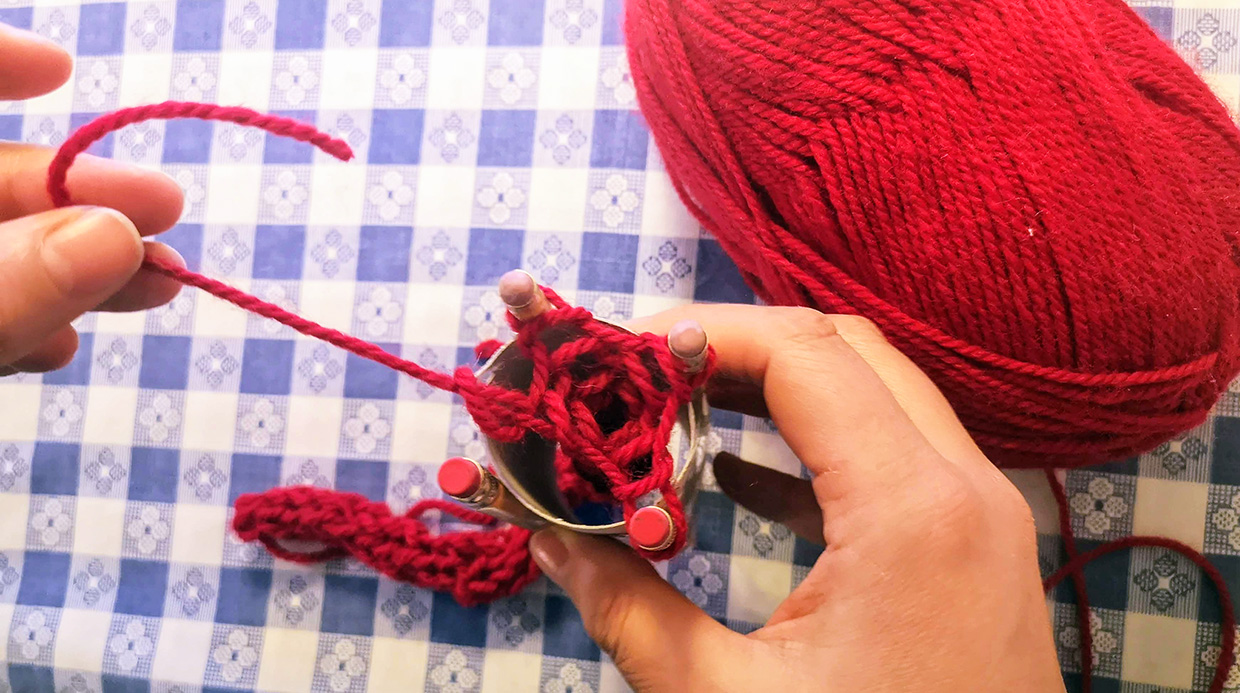
Take the bottom loop of yarn from the first peg, and lift it over the peg, passing the top loop. Do this with each peg.
You have now made four stitches. In knitting, this is called casting on.
Step 4: Get corking!
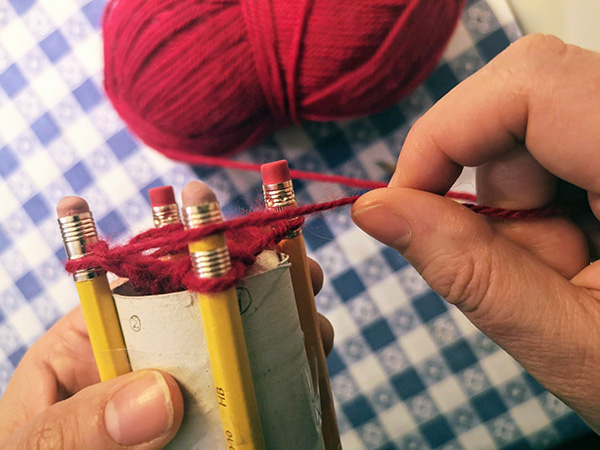
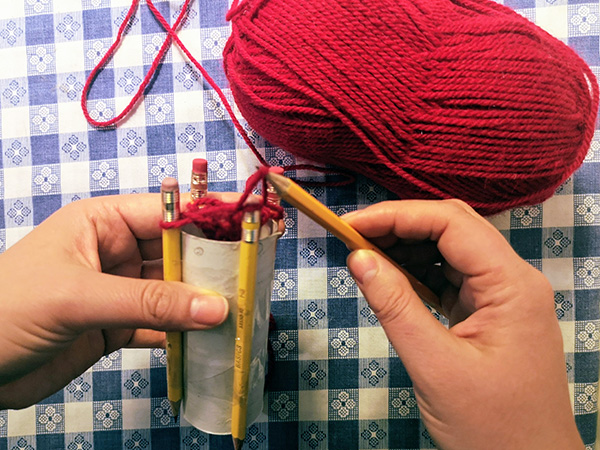
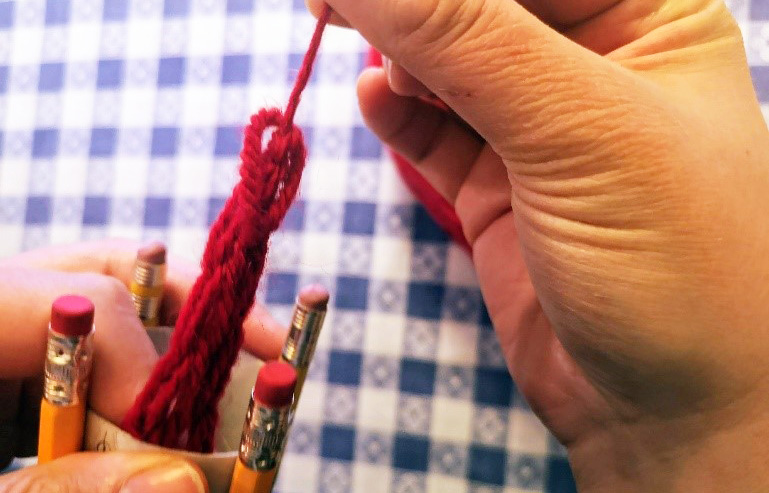
Continue wrapping the yarn around the outside of the pegs and pulling the bottom loop of yarn over the top of the peg.
If you like, use another pencil to help move the stitches over the top of the peg. Your cord will begin to emerge from the bottom of the toilet paper roll!
Repeat the same process, around and around, until your cord is as long as you want it to be!

Step 5: Casting off
To finish corking, you need to properly cast off your stitches to stop the cord from unraveling when you take it off the loom.
To cast off, you need to:
(1) Cut the yarn from the ball, leaving a tail of about 6 inches long.
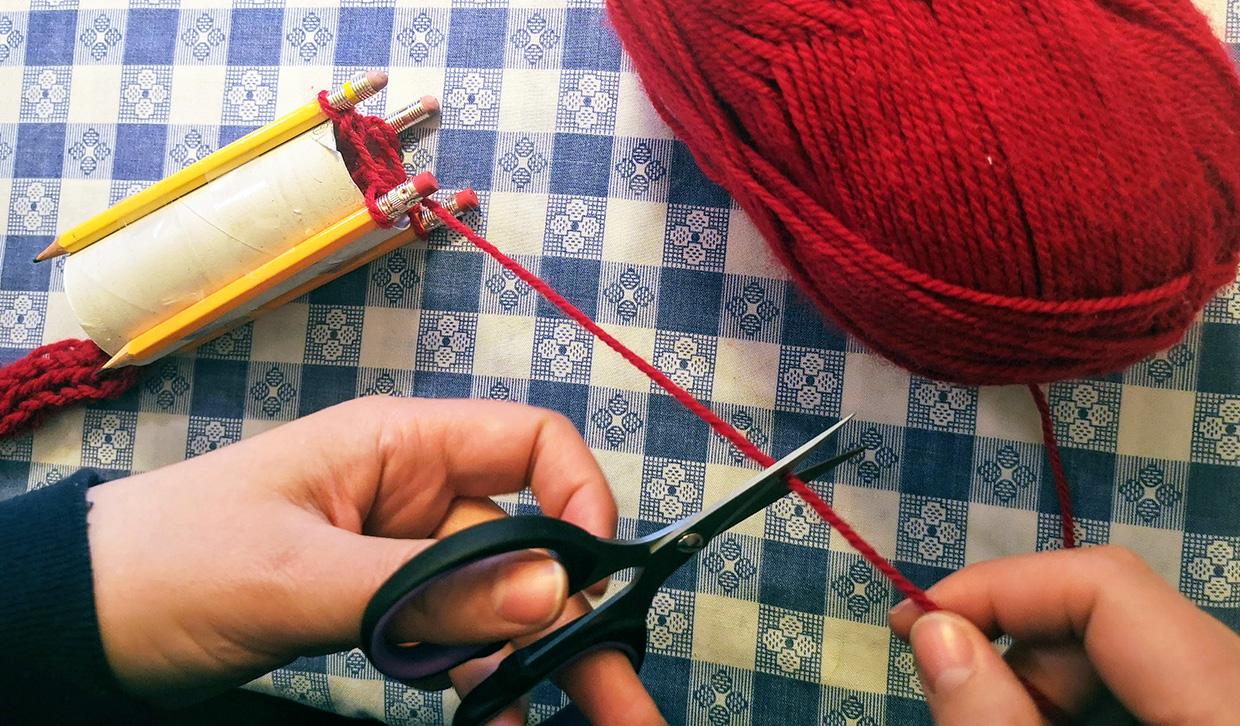
(2) Pull the end of the yarn through the last stitch you made. This will pull the yarn off the peg. Pull tight.
(3) Make another stitch on the next peg and pull the end through this stitch, taking the yarn off the peg and pulling tight.
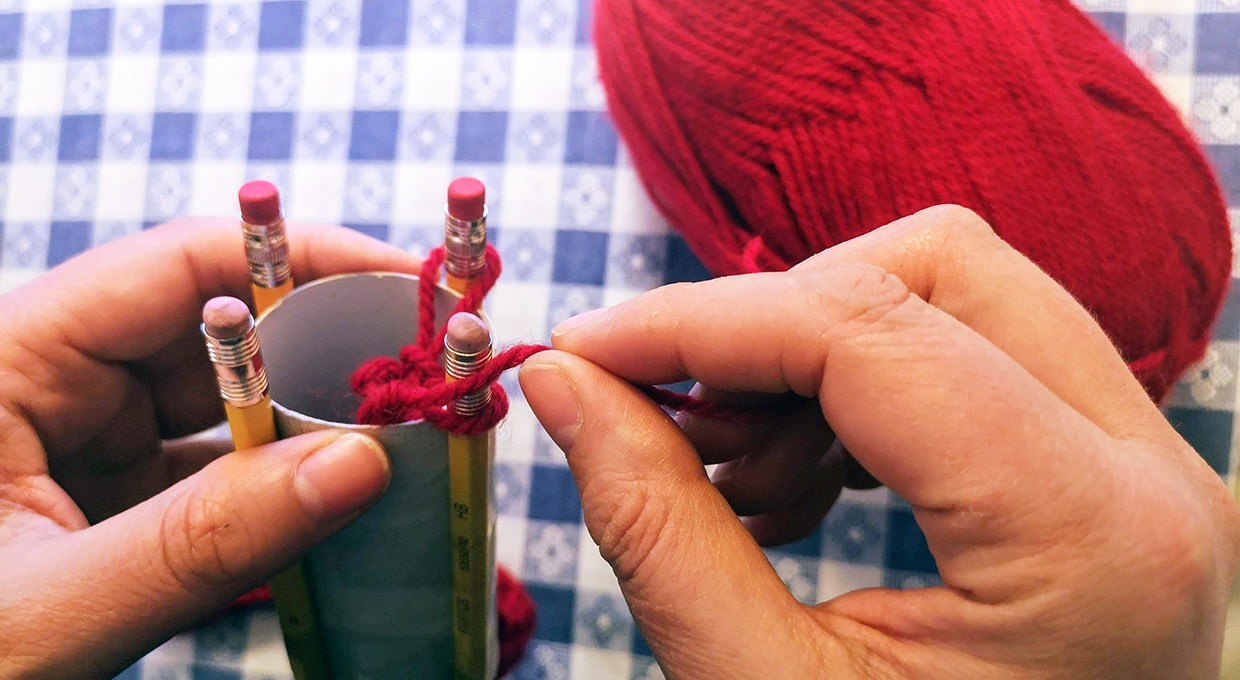
(4) Repeat this step with the remaining two pegs and pull tight once more! You can now pull the finished cord out.

Step 6: Use your imagination!
What will you make with your knitted cord? A woolen bracelet? A garland for a Christmas tree? Or maybe sew it into a coil, making a hot pad for the kitchen. I’ve made mine into a headband!
Share your ideas and creations with us! Send photos to us on Facebook or Instagram, or email them to village.info@trca.ca. We can’t wait to see what you make!
