Add some personal style to your reading life by crafting your own woven bookmark!
At The Village at Black Creek’s Weaver’s Shop, the weaver uses a large wooden machine called a loom to make blankets, rugs, and table runners.
With this easy craft you can make your own loom from a piece of cardboard, and weave a bookmark with items from around your house!
Woven Bookmark Tutorial
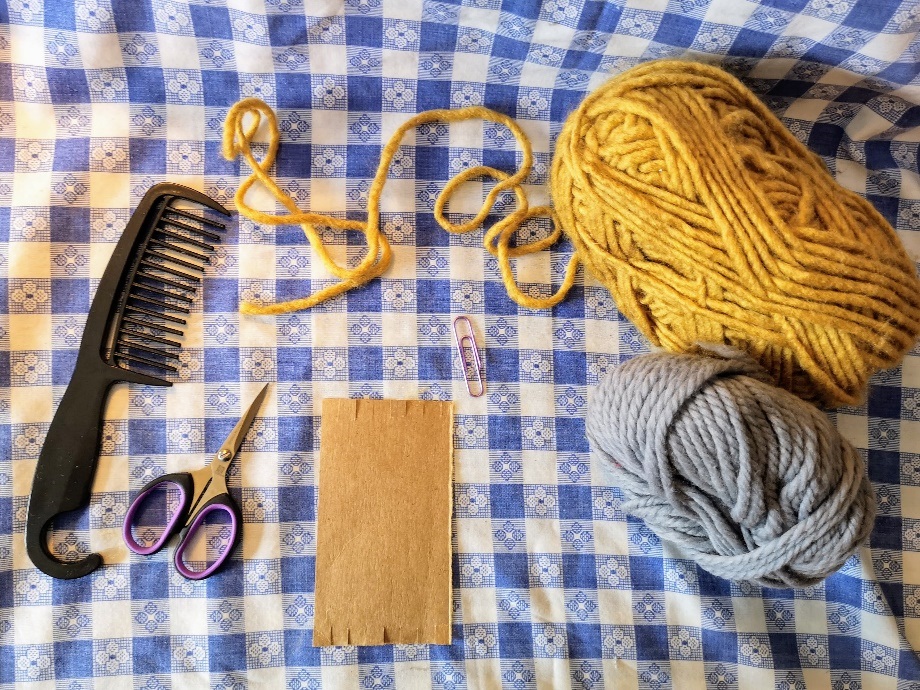
Step 1: Gather your supplies
You will need:
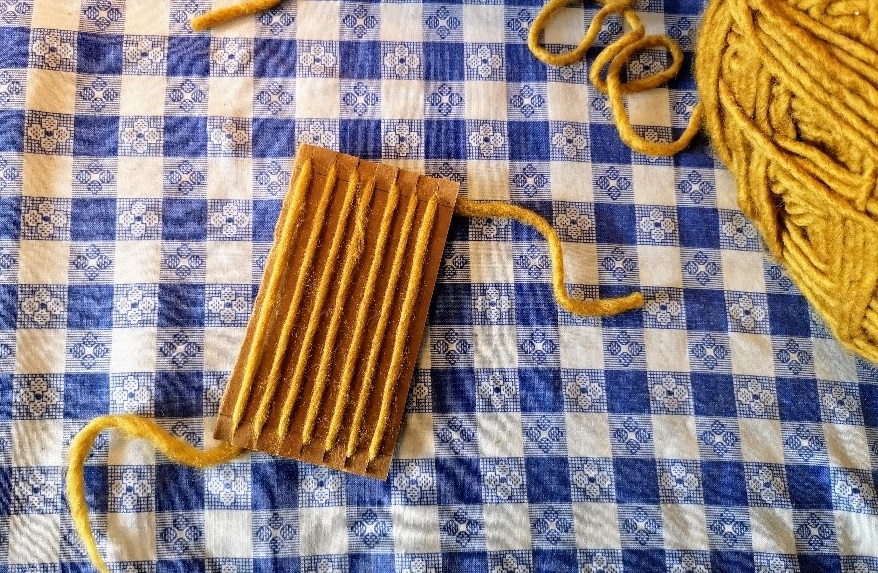
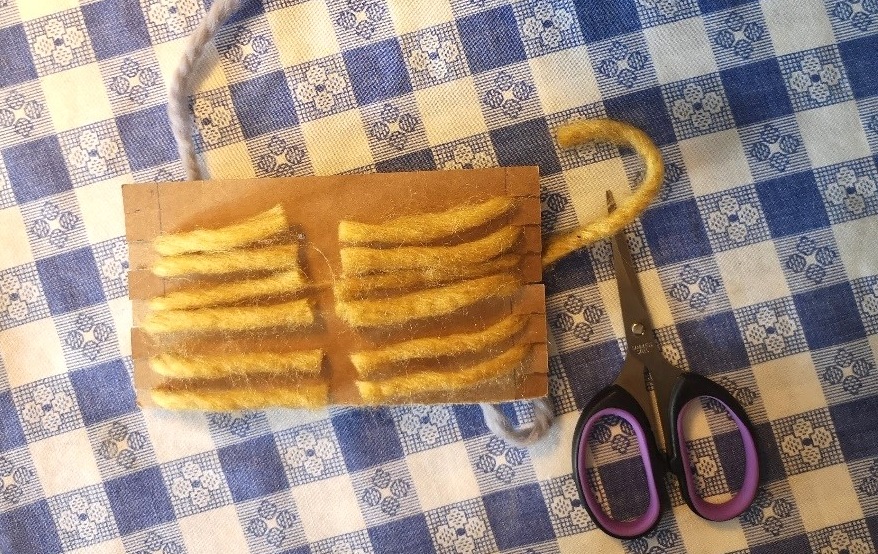
- A small piece of cardboard. This will be your loom. The one in the picture above is 8 cm wide and 14 cm tall.
- At least 3 meters of yarn or string. This will be your warp and weft thread.
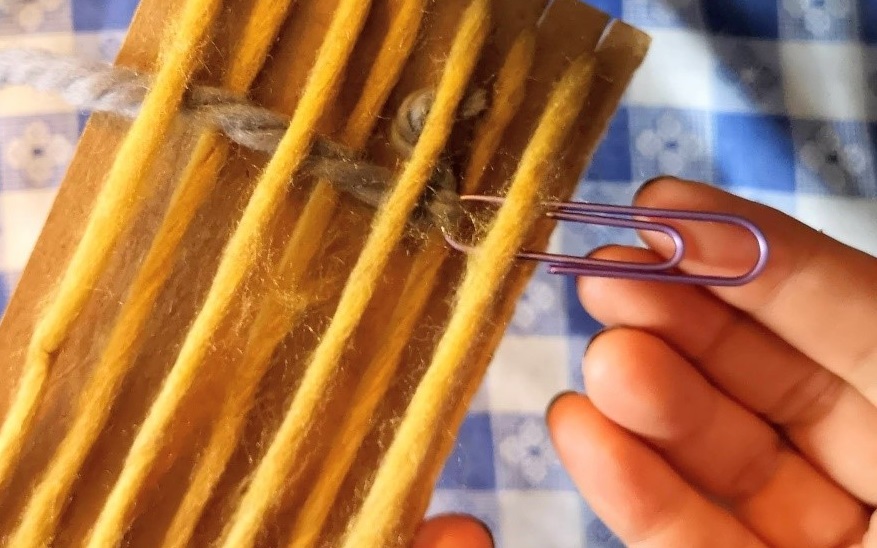
- A paper clip. This is your shuttle. It carries the weft thread.
- A hair comb. This is your beater bar to help push your weft thread into place.
- Scissors. These are still scissors!
A ruler and a pencil to mark your loom may be helpful as well.
WEAVING TERMS
Loom: A machine a weaver uses to weave cloth.
Weft: The thread the weaver holds in their hands. It is the active thread passing over and under the warp thread.
Warp: the threads held in place on the loom. This thread does not move.
Shuttle: The shuttle is attached to the weft threads. It carries the weft thread through the warp threads.
Beater Bar: The beater bar pushes the weft threads in to place along the warp threads so there are no gaps in the cloth.
Step 2: Make your loom!
Cut a series of 1 cm slits into the top and bottom of the piece of cardboard. The example in the photo below has seven slits, each about 1 cm from the next.
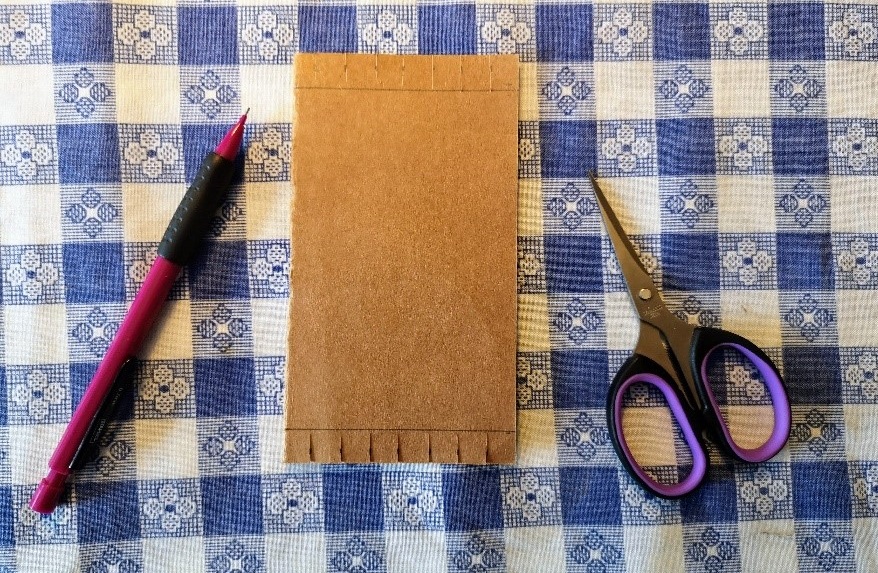
Take your yarn or string and thread your “loom” by tightly wrapping string around the cardboard, tucking it into each slit. Leave a tail on each end. This string is your warp.
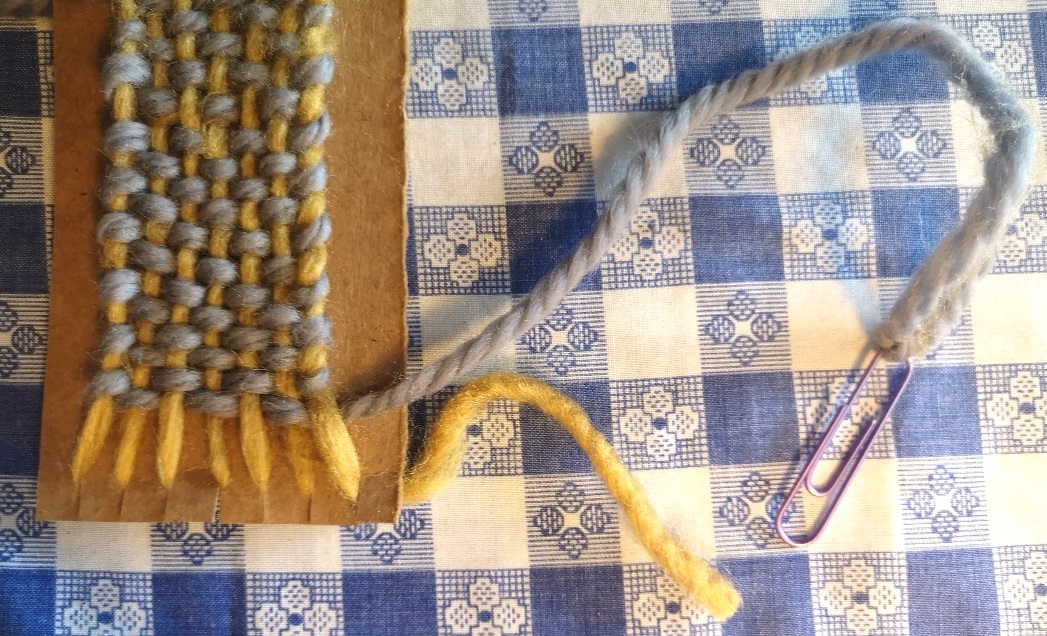
Step 3: Make your shuttle and start weaving
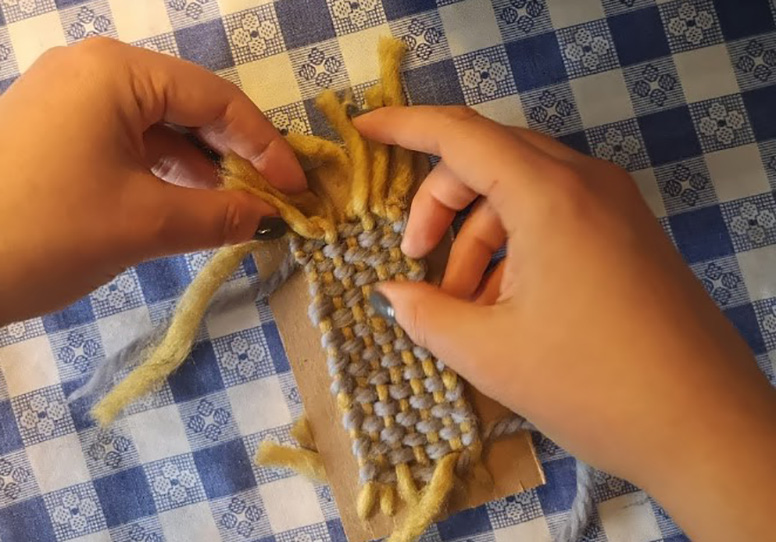
Cut a second piece of string to a length of one wingspan (about 1 meter). This will be your weft.
Tie one end of this string to the paper clip. You can now begin weaving by passing your paper clip shuttle through the warp thread, alternating above and below.
With each pass, pull the string all the way through, and then turn around and continue the pattern in the other direction. On your first pass, you will need to leave a tail, as you did with the warp.
Step 4: Using the beater bar
As you go back and forth, pay attention to your tension. Don’t pull too tight or you will end up with an hourglass shaped bookmark!
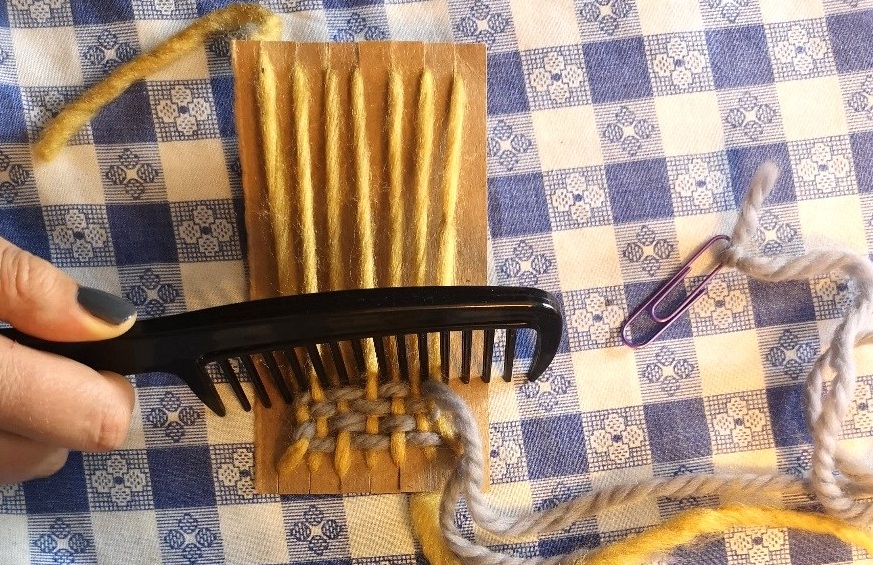
Use the comb as a beater bar to push down your weft string after each pass of the paperclip shuttle across the warp. This will help to keep your work tight and neat.
Step 5: Tying off
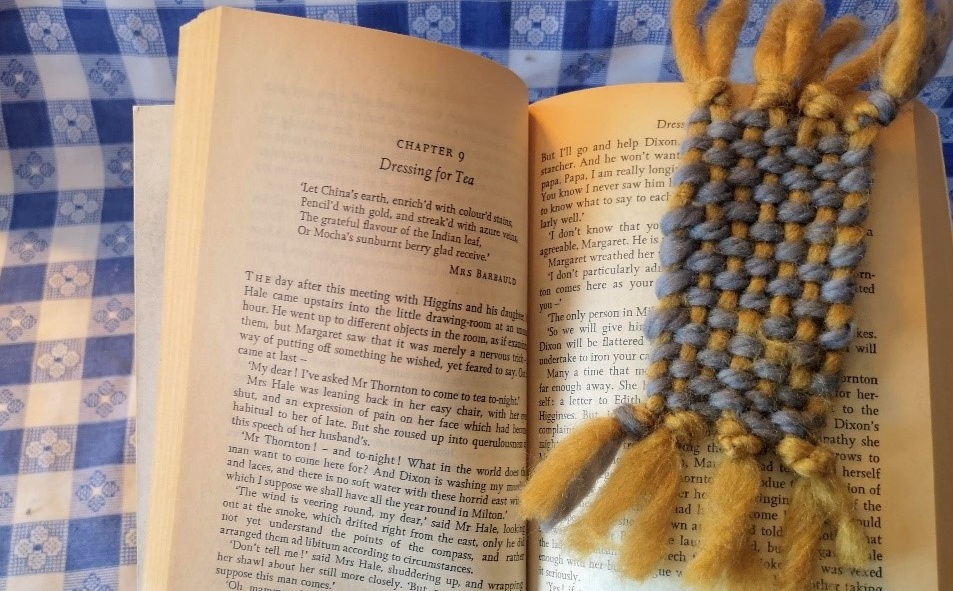
You can make your bookmark as long or short as you like! When you are done weaving, tie the warp and weft tail ends together in a simple knot.
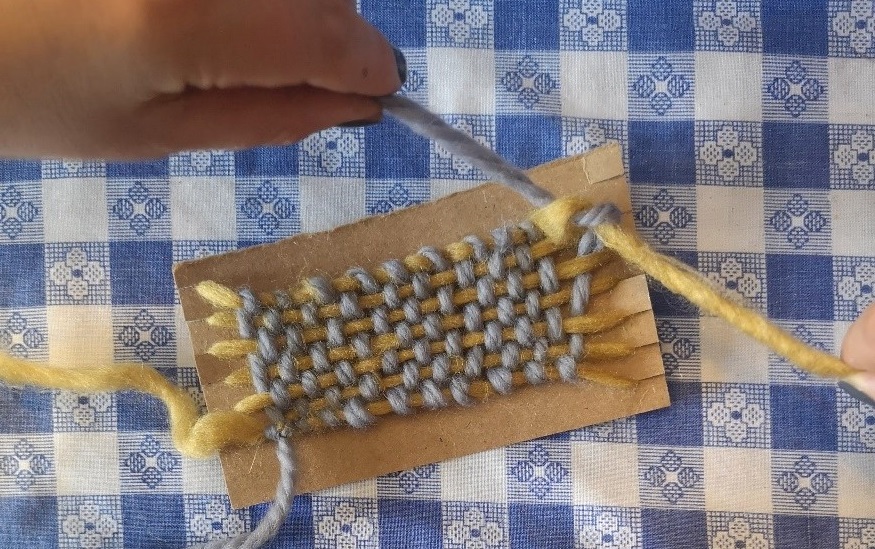
Next, turn your loom around and cut the threads in the middle.
Tie the thread ends together to secure your weaving. Trim them down to your preferred length.
And now, back to reading!
Step 6: Share your masterpiece with us
Share your woven bookmark with us on Facebook and Instagram, or email us a photo at village.info@trca.ca. We can’t wait to see what you made!
 |
