Time travel back to the very origins of modern photography by building your own camera obscura.
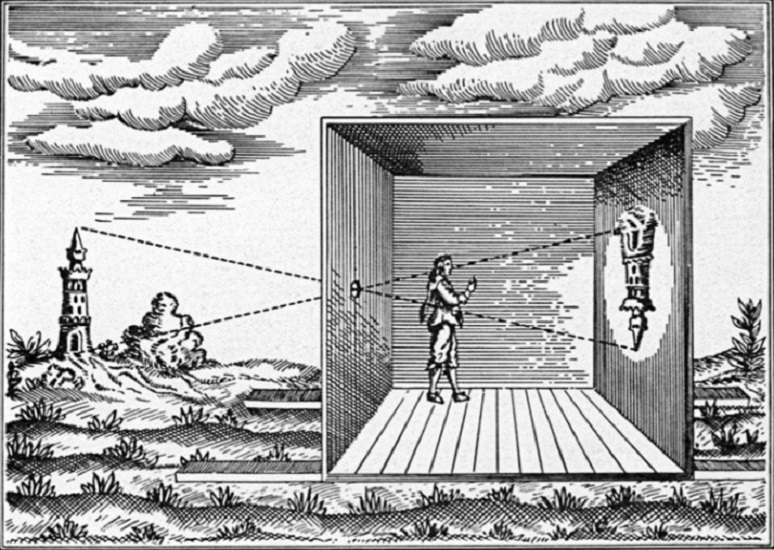
A camera obscura (also known as a pinhole camera) is a tool used to view the optical phenomenon known as the “pinhole effect”: light traveling through a small opening in a dark room or a box will project an image on the surface across from it.
The existence of this effect was known for hundreds of years, but in the early 19th century camera obscuras became the basis for devices used to create the first photographs, and led to the invention of cameras as we know them today.
To learn more, check out our online exhibit on the History of 19th Century Photography.
There are several ways to make a camera obscura. Here is a simple method that uses supplies you can find around your house!
Camera Obscura Tutorial
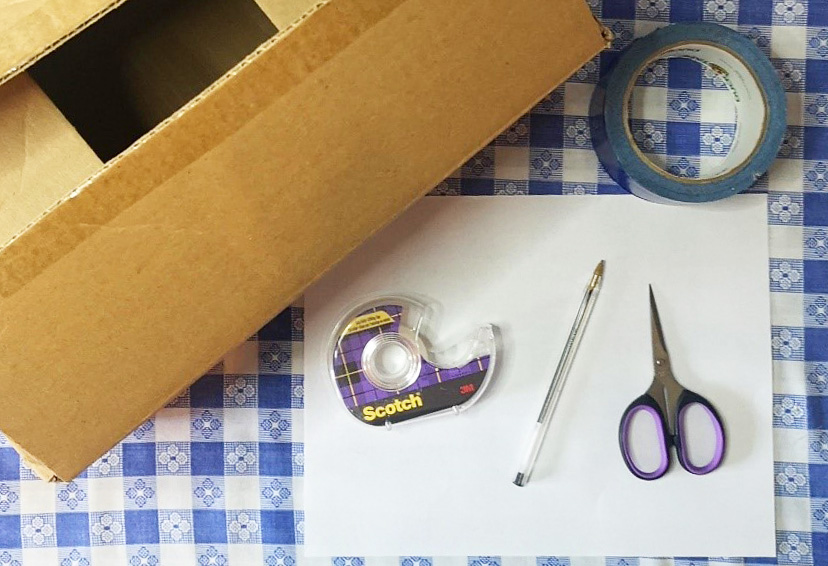
Step 1: Gather your supplies
You will need:
- A box that can be closed (either with a lid or with tape)
- A sheet of white paper
- Scissors
- A pen or pencil
- Some dark-coloured, heavy-duty tape such as duct tape, electrical tape, or hockey tape
Tip: You can use a box of any size, but we found it easiest to work with one that’s at least 10 to 12 inches wide.
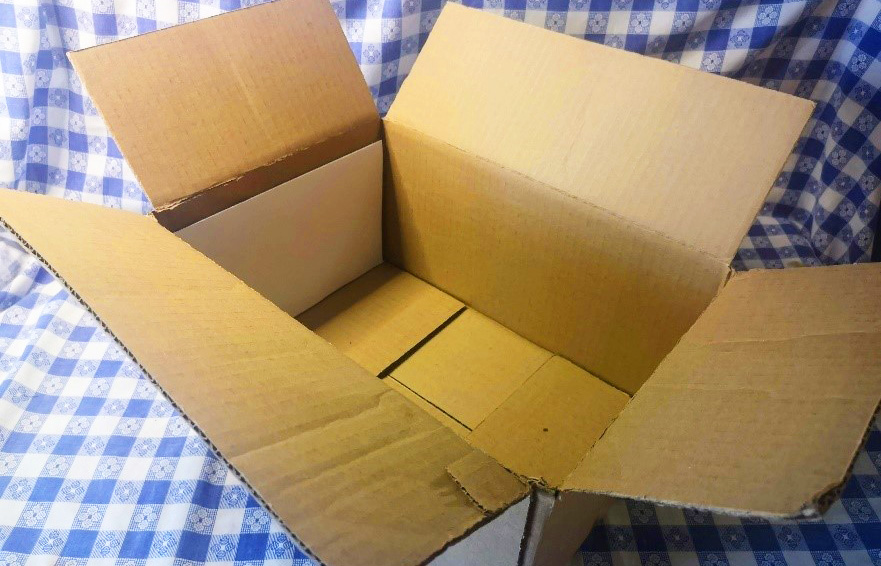
Step 2: Make the screen
Cut the piece of white paper to fit one side of your box; use the tape to attach it to the inside. This will be the screen that your image projects onto.
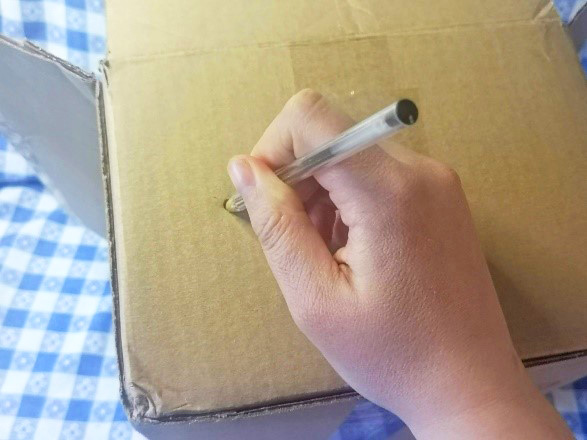
Step 3: Make some holes!
You need to make two holes in the side of the box directly across from your screen. One hole should be small: just poke the tip of your pen or pencil through the box.
The second hole will be your viewing hole. This one can be bigger — just enough for you to be able to see into the box.
You want to place the holes far enough apart so that when you look through the viewing hole, your head won’t block the light from entering the smaller hole.
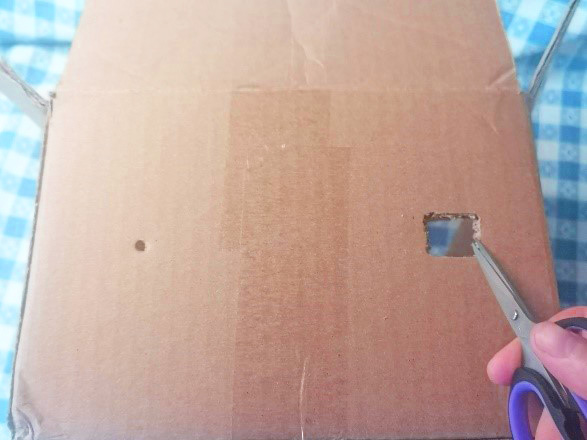
Tip: If you make your holes too big, or put them in the wrong spot, don’t worry! You can patch it up with some extra cardboard and tape and try again!
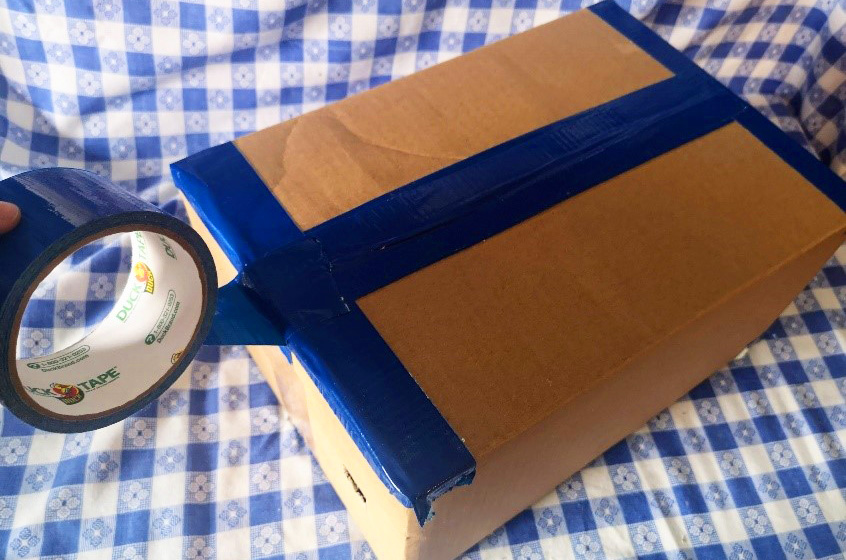
Step 4: Close it up, tape it shut
Close your box and tape it shut using the dark-coloured tape. When you look into your box you shouldn’t be able to see light leaking in from the corners or edges.
Use a second or even a third layer of tape to make sure there is no extra light coming in.
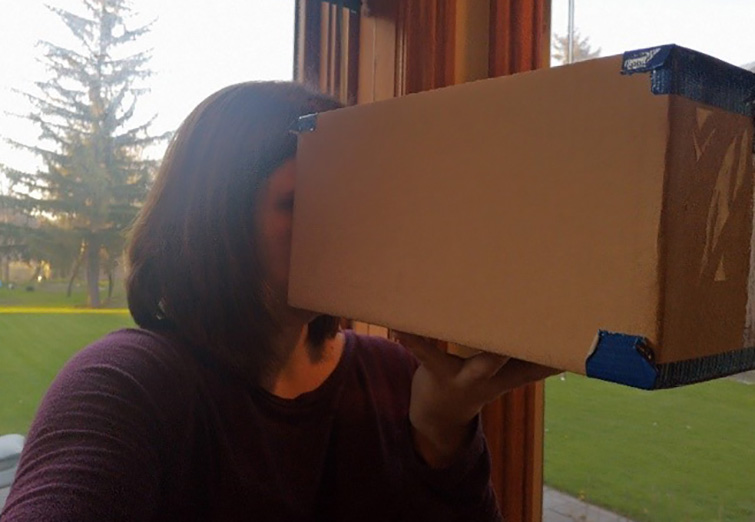
Step 5: Try it out!
Your camera obscura will work best if you are in a dark room with the holes pointing toward a bright subject. For my experiment, I turned off the lights in the room and stood with my back to a window.
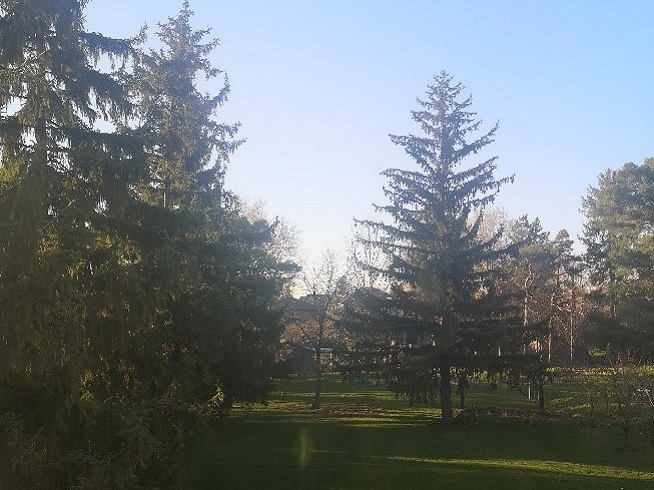
When I looked into the viewing hole, I was able to see a tree projected upside-down on the screen! It was pretty dim, but I could clearly make out the tree!
You can see how the image appeared below on the left. To the right is an actual photograph of the tree
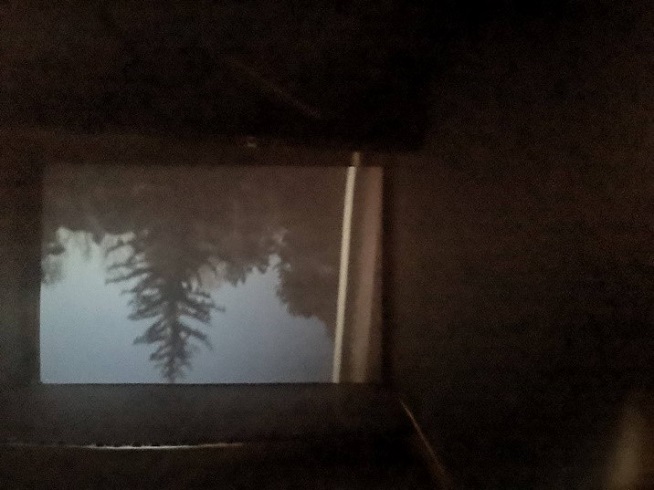
When I put my phone to the viewing hole to take a picture, it blocked more light coming into the box. This made the image appear more clearly; I was even able to see some colour!
DID YOU KNOW? A camera obscura can be used to look at the sun without damaging your eyes! These devices have been used for centuries to study solar eclipses, and are still a popular way to safely view them today.
TROUBLESHOOTING YOUR CAMERA OBSCURA
If you can’t see the image at first, there are a few tricks you can try:
- Move around! Carefully walk back and forward, moving the camera up and down and side to side, until you see an image. It might take a little practice, as the scene you are trying to see is behind you.
- If all you see is darkness or a very dim image, you can try making your pinhole a little bigger. The image won’t be as clear, but it will be brighter.
- Try turning off all the lights in the room, but leave one lamp lit. Stand with your back to the lamp, about five feet away.
- Make a camera hood! Have you ever seen a photographer in an old movie taking a photo from underneath a black cloth? This is the same idea! Put a blanket over your head and part of your camera, leaving the pinhole uncovered. You should be able to see the image more clearly.
 |

